How to Download Results
In Elevate, after you make a selection your results will appear on the bottom of your screen, to configure your results follow the guide below.
This help guide walks through: how to choose your result layer, how to search for results, how to filter results, how to download results, and how to reorganize or choose which attributes appear in the result window.
Results are generated by making a selection. You can make a selection by searching in the Quick Search or Advanced Search Toolbars, or by using the selection tools under your name .

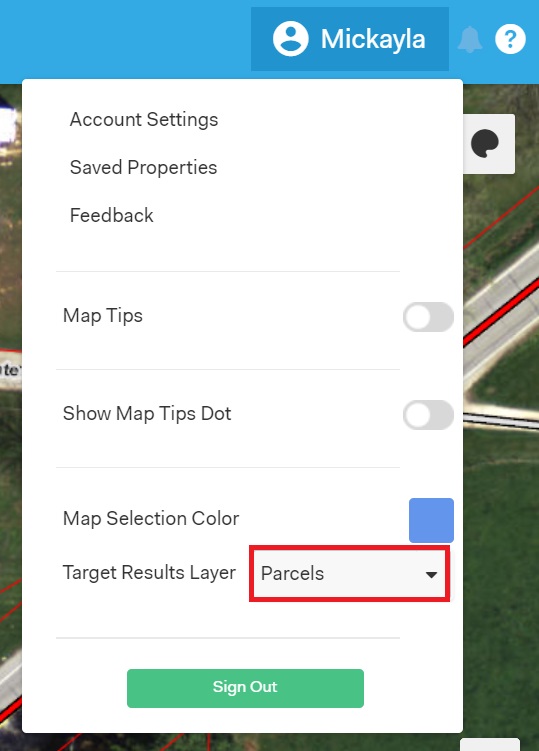
Once you have made a selection, you can view details about on that parcel in a table at the bottom of the screen. Results are automatically shown in terms of Parcels, but you can view them in terms of other categories (such as Neighborhoods) by selecting a category from the Target Results Layer drop-down menu under your name.
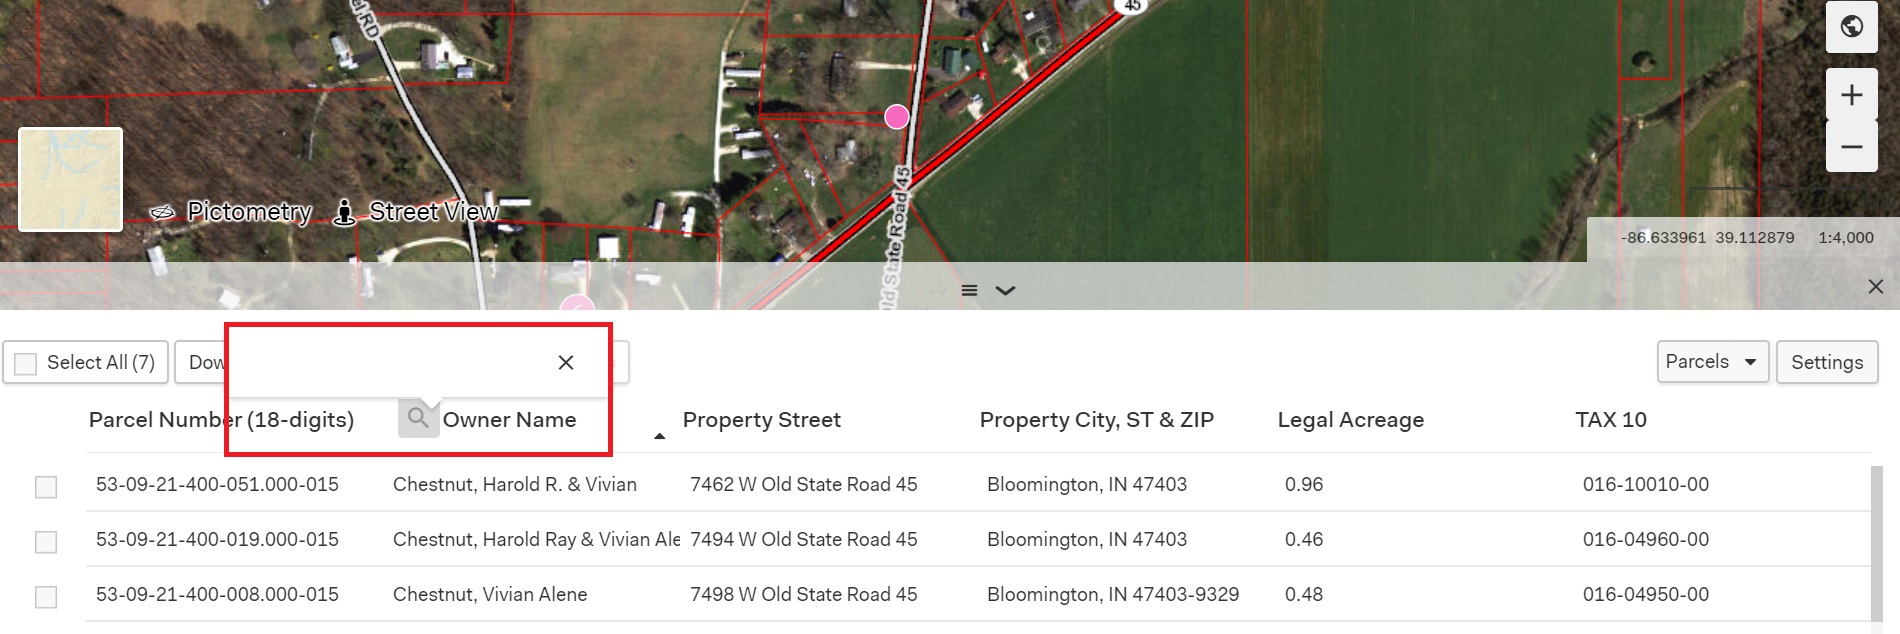
You can search for specific results by hovering over one of the result columns, such as Owner Name. Click on the gray box that appears to the left of the column name, and type the specific result into the box. Click Enter and the result will appear below.
To filter results in alphabetical order, click on the name of the column, such as Owner Name. All results will automatically filter alphabetically based on that column.
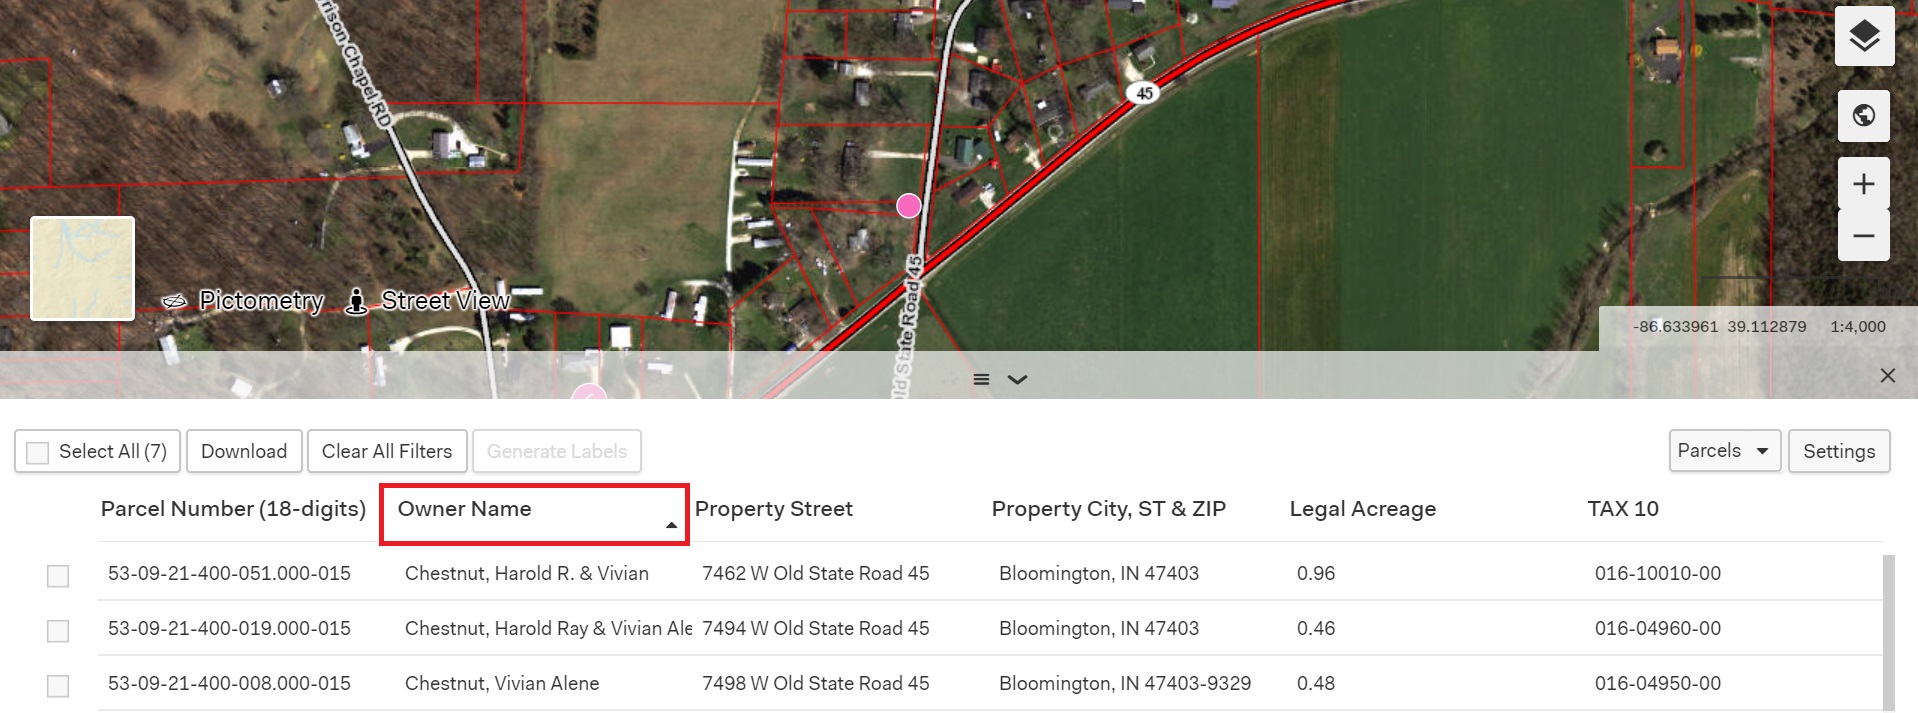
To reset your filters back to default, click Clear All Filters.

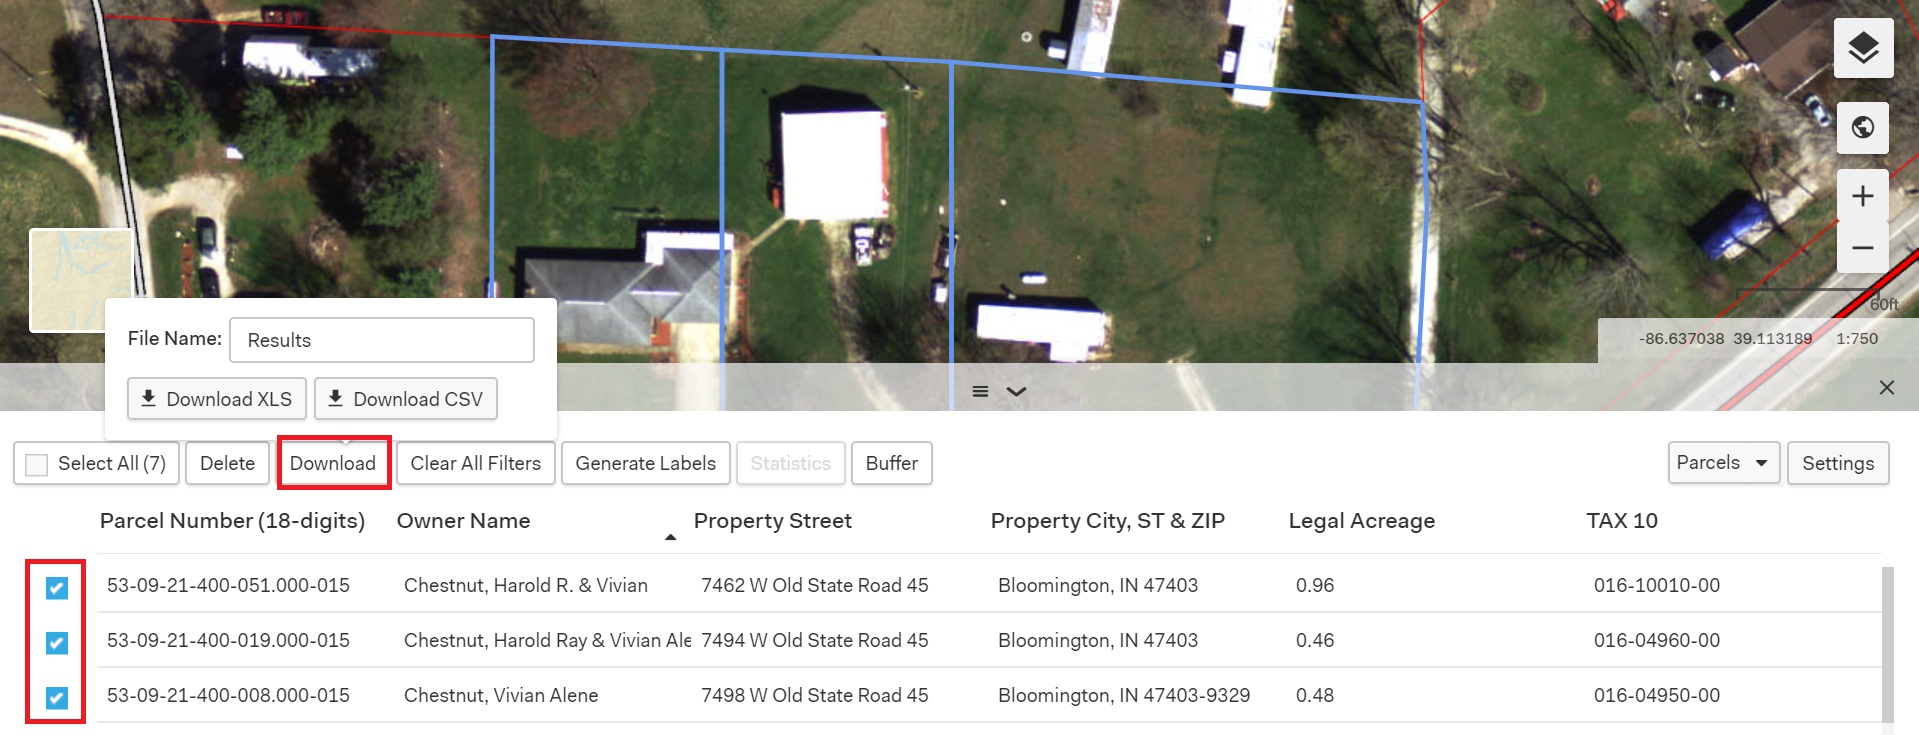
To download your results, select which results you want to download, then click Download. Type the name of the file, and choose to download as an XLS or CSV file.
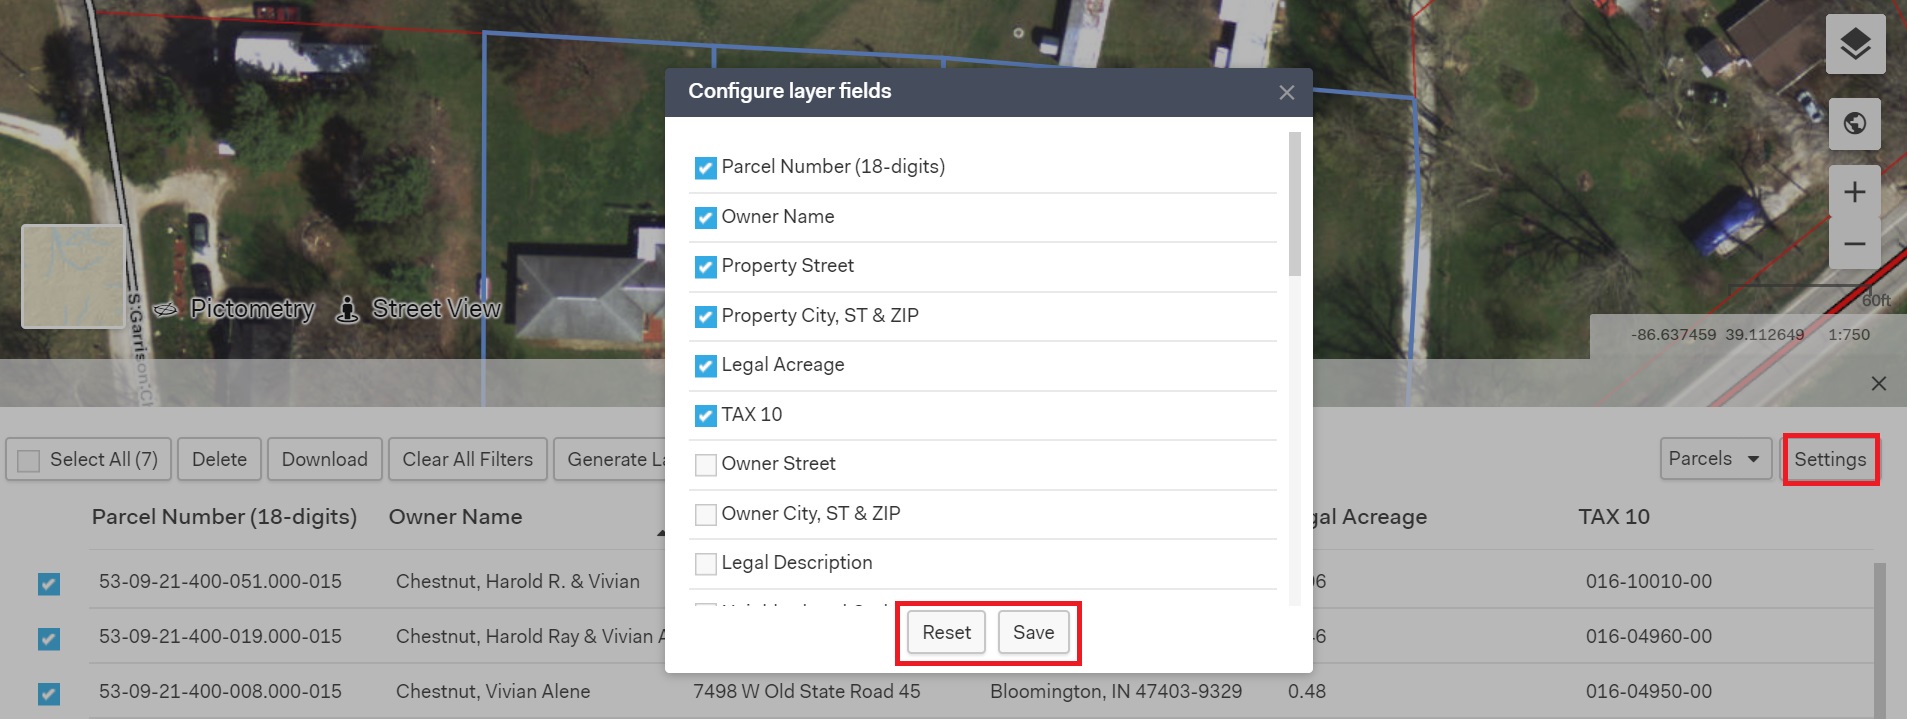
To change what fields you see in the Results window and to reorganize the fields, click on Settings on the right of your results table. In the Configuration window, turn on/off fields by clicking the box to the left. Reorganize the fields by clicking and dragging them. Save your changes by clicking Save, or reset the fields back to default by clicking Reset.
